netty
简介
Netty项目是一个旨在为可维护的高性能、高扩展性协议服务器和客户端的快速开发提供异步事件驱动的网络应用框架和工具。
Netty可以很简单的编写客户端服务端,并且对tcp,udp,http,ssl等有很好的支持。由于是异步的,所以性能很高。
事件驱动:事件驱动是指在持续事务管理过程中,进行决策的一种策略,即跟随当前时间点上出现的事件,调动可用资源,执行相关任务,使不断出现的问题得以解决,防止事务堆积。也就是发生某件事情时,可以调用某些方法。在netty中需要适应事件驱动编程。
netty在java NIO之上进行了封装,使用更便捷,解决了空轮询的bug。
使用
在学习netty之前,需要学习java的NIO,网络编程。
先写一个简单的例子:
丢弃服务器
世界上最简单的协议是丢弃协议:服务器接受到数据后,直接丢弃。
1 | package com.zzx.discard; |
- NioEventLoopGroup是一个多线程事件循环,处理输入输出操作。Netty为不同类型的传输提供各种事件循环组实现。在这个例子中,我们实现了一个服务器端应用程序,因此将使用两个NioEventLoopGroup。第一个通常被称为boss,accept一个传入的连接。第二个通常被称为worker,一旦boss accept了该连接并向worker注册了该连接,worker就处理这个连接。使用多少线程以及它们如何映射到创建的通道取决于事件循环组的实现,也可以通过构造函数进行配置。
- ServerBootstrap是一个设置服务器的帮助类,用于配置各种参数
- 我们需要将worker和boss添加进去
- 表示使用NioServerSocketChannel这个通道类作为通道,当然也可以使用阻塞IO(OioServerSocketChannel)
- 添加ChannelInitializer,对于每一个channel都会初始化进行一些初始化操作,比如向对应的pipeline中添加handler
- 添加Channelhandler,也就是真正的业务逻辑,用来处理请求,向管道pipeline添加handler(需要自己实现),ChannelHandler是程序的核心,最好是把ChannelHandler当作一个通用的容器,处理进来和出去的事件(包括数据)。
- 添加服务端的一些参数,这个是连接队列长度
- 添加属性,保持长连接
- 绑定到端口,返回一个ChannelFuture,这是异步的,因此可能还没有成功,可以使用它的方法判断是否成功。
- 只是为了不让程序停止
- 关闭另个事件循环
接下来看一看丢弃的具体逻辑1
2
3
4
5
6
7
8
9
10
11
12
13
14
15
16
17
18
19
20package com.zzx.discard;
import io.netty.channel.ChannelHandlerContext;
import io.netty.channel.ChannelInboundHandlerAdapter;
//3
public class DiscardServerHandler extends ChannelInboundHandlerAdapter {
public void channelRead(ChannelHandlerContext ctx, Object msg){
//1
((ByteBuf) msg).release();
}
//2
public void exceptionCaught(ChannelHandlerContext ctx, Throwable cause){
cause.printStackTrace();
ctx.close();
}
}
- 当连接后,客户端发送消息,服务端会触发channelRead事件,因此在channelRead()函数内实现可读时的逻辑,netty基于引用计数,因此丢弃消息,直接将其释放即可。
- 处理异常发生的事件,当Netty因输入/输出错误引发异常或处理事件时引发异常时,处理程序实现调用exceptionCaught()事件处理程序方法时会使用Throwable。在大多数情况下,应该记录捕获到的异常,并在这里关闭其关联的通道。通常,可以在关闭连接之前发送一条带有错误代码的响应消息。
- ChannelInboundHandlerAdapter封装了一系列可以实现的方法,代表一系列事件。这个类代表了“进入服务器的顺序”,那么也有“出服务器的的类”ChannelOutboundHandlerAdapter
使用:这个简单的例子不需要编写客户端,因次直接在终端输入telnet 127.0.0.1 端口(此例telnet 127.0.0.1 8080),然后输入内容即可。此时我们看不见任何消息,因为服务端并直接将消息丢弃了。
如果想要显示内容可以在替换以上函数:1
2
3
4
5
6
7
8
9
10
11public void channelRead(ChannelHandlerContext ctx, Object msg){
//1
ByteBuf in=(ByteBuf)msg;
try {
while (in.isReadable()){
System.out.println((char)in.readByte());
}
}finally {
ReferenceCountUtil.release(msg);
}
}
- 在nio中使用buffer作为数据的容器,netty也一样,但是netty将buffer进行了更高级的封装。
从以上可以看出netty的另一个优点:业务分离,在DiscardServer类中调用netty的api,在Handler中编写自己的逻辑。
echo服务器
以上的内容简单的介绍了netty框架使用的流程,但是例子太简单,只能客户端给服务端发消息。
现在有一个需求:客户端输入数据,服务端接收到数据后将数据打印出来,并且将数据传入到客户端。编写一个Echo协议。
第一步:服务端调用netty的api:几乎和上一个例子一模一样1
2
3
4
5
6
7
8
9
10
11
12
13
14
15
16
17
18
19
20
21
22
23
24
25
26
27
28
29
30
31
32
33
34
35
36
37package com.zzx.echo;
public class EchoServer {
private int port;
public EchoServer(int port) {
this.port = port;
}
public void run(){
EventLoopGroup boss=new NioEventLoopGroup();
EventLoopGroup worker=new NioEventLoopGroup();
try {
ServerBootstrap b=new ServerBootstrap();
b.group(boss,worker);
b.channel(NioServerSocketChannel.class)
.childHandler(new ChannelInitializer<SocketChannel>() {
protected void initChannel(SocketChannel ch) throws Exception {
//添加具体的handler
ch.pipeline().addLast(new EchoServerhandler());
}
})
.option(ChannelOption.SO_BACKLOG,16)
.childOption(ChannelOption.SO_KEEPALIVE,true);
ChannelFuture f=b.bind(port).sync();
f.channel().closeFuture().sync();
} catch (InterruptedException e) {
e.printStackTrace();
}
}
public static void main(String[] args) {
new EchoServer(8080).run();
}
}
handler:1
2
3
4
5
6
7
8
9
10
11
12
13
14
15
16
17
18
19
20
21
22package com.zzx.echo;
public class EchoServerhandler extends ChannelInboundHandlerAdapter {
public void channelRead(ChannelHandlerContext ctx, Object msg) throws Exception {
ByteBuf buf= (ByteBuf) msg;
System.out.println("server received"+ buf.toString(CharsetUtil.UTF_8));
//1
ctx.write(buf);
}
//阅读完成触发该事件
public void channelReadComplete(ChannelHandlerContext ctx) throws Exception {
//2,3
ctx.writeAndFlush(Unpooled.EMPTY_BUFFER)
//4
.addListener(ChannelFutureListener.CLOSE);
}
}
- ctx.write,写入一个ByteBuf或者FileRegion。
- ctx.flush()和write()可以合为writeAndFlush(),write并不会将数据传给客户端,只用调用flush之后才会。write之后会自动进行release引用计数,因此这里不需要手动释放
- Unpooled是一个工具类,提供了关于ByteBuf的很多方法
- 添加一个监听器,当该事件发生后会关闭此连接
客户端:代码与服务端类似1
2
3
4
5
6
7
8
9
10
11
12
13
14
15
16
17
18
19
20
21
22
23
24
25
26
27
28
29
30
31
32
33
34
35
36
37
38
39package com.zzx.echo;
public class EchoClient {
//1
private String host;
private int port;
public EchoClient(String host, int port) {
this.host = host;
this.port = port;
}
public void run() {
//2
EventLoopGroup worker = new NioEventLoopGroup();
try {
//3
Bootstrap b = new Bootstrap();
b.group(worker);
b.channel(NioSocketChannel.class)
.handler(new ChannelInitializer<SocketChannel>() {
protected void initChannel(SocketChannel ch) throws Exception {
ch.pipeline().addLast(new EchoClientHandler());
}
});
ChannelFuture f=b.connect(host,port).sync();
f.channel().closeFuture().sync();
} catch (InterruptedException e) {
e.printStackTrace();
}
}
public static void main(String[] args) {
new EchoClient("127.0.0.1",8080).run();
}
}
- 客户端连接服务端需要知道服务端的主机和端口
- 只需要一个事件循环即可,不需要监听
- 客户端和服务端的引导不一样
handler:1
2
3
4
5
6
7
8
9
10
11
12
13
14
15
16
17
18
19
20
21
22
23
24package com.zzx.echo;
public class EchoClientHandler extends SimpleChannelInboundHandler<ByteBuf> {
//连接成功后触发该事件,写入消息发送给服务端
public void channelActive(ChannelHandlerContext ctx) throws Exception {
ctx.writeAndFlush(Unpooled.copiedBuffer("Netty rocks!", CharsetUtil.UTF_8));
}
public void exceptionCaught(ChannelHandlerContext ctx, Throwable cause) throws Exception {
cause.printStackTrace();
ctx.close();
}
//接收到服务端的消息并答应
protected void channelRead0(ChannelHandlerContext ctx, ByteBuf msg) throws Exception {
System.out.println("client receive: "+msg.toString(CharsetUtil.UTF_8));
}
}
SimpleChannelInboundHandler也是一个InboundHandler,具体用法可以参考官方文档。
使用:先启动服务端,再启动客户端
编码解码
在网络中传输的是字节流,我们之前获取的msg也是ByteBuf,那么每次都这样类型装换太麻烦了,可以使用编码解码器,只需要继承一些类复写一些方法即可。如果传输的是一个对象,那么又该怎么办呢:发送时将对象序列化为一个字节数组,接受时将字节数组发序列化为对象。
一个需求:服务端发送一个对象,客户端接收该对象
比如:
一个Pojo类:1
2
3
4
5
6
7
8
9
10
11
12
13
14
15public class Pojo implements Serializable {
private int a;
private String b;
public Pojo(int a, String b) {
this.a = a;
this.b = b;
}
public String toString() {
return "Pojo{" +
"a=" + a +
", b='" + b + '\'' +
'}';
}
}
Server:1
2
3
4
5
6
7
8
9
10
11
12
13
14
15
16
17
18
19
20
21
22
23
24
25
26
27
28
29
30
31
32
33
34
35
36package com.zzx.pojo;
public class PojoServer {
private int port;
public PojoServer(int port) {
this.port = port;
}
public void run(){
EventLoopGroup boss=new NioEventLoopGroup();
EventLoopGroup worker=new NioEventLoopGroup();
try {
ServerBootstrap b=new ServerBootstrap();
b.group(boss,worker)
.channel(NioServerSocketChannel.class)
.childHandler(new ChannelInitializer<SocketChannel>() {
protected void initChannel(SocketChannel ch) throws Exception {
//1,2
ch.pipeline().addLast(new PojoEncode());
ch.pipeline().addLast(new PojoServerHandler());
}
})
.option(ChannelOption.SO_BACKLOG,16)
.childOption(ChannelOption.SO_KEEPALIVE,true);
ChannelFuture f=b.bind(port).sync();
f.channel().closeFuture().sync();
} catch (InterruptedException e) {
e.printStackTrace();
}
}
public static void main(String[] args) {
new PojoServer(8080).run();
}
}
- 将自己编写的编码器放入pipeline,然后放入handler,注意pipeline中可以放入多个handler,内部是一个链式的结构,可以顺序执行handler。
- 注意自己实现的PojoEncode继承自:ChannelOutboundHandlerAdapter类,因此需要将其放在PojoServerHandler之前(由于在pipeline中的顺序,OutBound需要放在至少一个InBound之前)
接下来看一看PojoEncode类1
2
3
4
5
6
7
8
9
10
11
12
13package com.zzx.pojo;
public class PojoEncode extends MessageToByteEncoder<Pojo> {
protected void encode(ChannelHandlerContext ctx, Pojo msg, ByteBuf out) throws Exception {
//序列化
ByteArrayOutputStream bo=new ByteArrayOutputStream();
ObjectOutputStream oo=new ObjectOutputStream(bo);
oo.writeObject(msg);
System.out.println(bo.toByteArray().length);
out.writeBytes(bo.toByteArray());
}
}
Handler:1
2
3
4
5
6
7
8public class PojoServerHandler extends ChannelInboundHandlerAdapter {
public void channelActive(ChannelHandlerContext ctx) throws Exception {
Pojo p=new Pojo(12,"jjj");
ctx.writeAndFlush(p);
System.out.println("write over");
}
}
客户端涉及到解码,为了节约篇幅只贴部分代码:1
2
3
4
5
6
7
8
9
10
11
12
13
14
15
16
17
18
19
20
try {
Bootstrap b=new Bootstrap();
b.group(worker);
b.channel(NioSocketChannel.class)
.handler(new ChannelInitializer<SocketChannel>() {
protected void initChannel(SocketChannel ch) throws Exception {
//1,2
ch.pipeline().addLast(new PojoDecode());
ch.pipeline().addLast(new PojoClientHandler());
}
})
.option(ChannelOption.SO_KEEPALIVE,true);
ChannelFuture f=b.connect(host,port).sync();
f.channel().closeFuture().sync();
} catch (InterruptedException e) {
e.printStackTrace();
}
- 将解码器添加到pipeline中,当接收到数据时,先解码,再走PojoClientHandler
- PojoDecode继承ChannelInboundHandlerAdapter
看一下Decode类:1
2
3
4
5
6
7
8
9
10
11
12
13public class PojoDecode extends ByteToMessageDecoder {
protected void decode(ChannelHandlerContext ctx, ByteBuf in, List<Object> out) throws Exception {
Object p=null;
byte[] out1 = new byte[in.readableBytes()];
ByteArrayInputStream bi=new ByteArrayInputStream(out1) ;
ObjectInputStream is=new ObjectInputStream(bi);
p= is.readObject();
out.add(p);
bi.close();
is.close();
}
}
客户端handler:1
2
3
4
5public void channelRead(ChannelHandlerContext ctx, Object msg) throws Exception {
System.out.println("start read");
Pojo p= (Pojo) msg;
System.out.println(p);
}
- 以上的无论是编码器解码器,实际上都是一个handler,只不过我们安排特定的顺序,让其执行了特定的功能而已
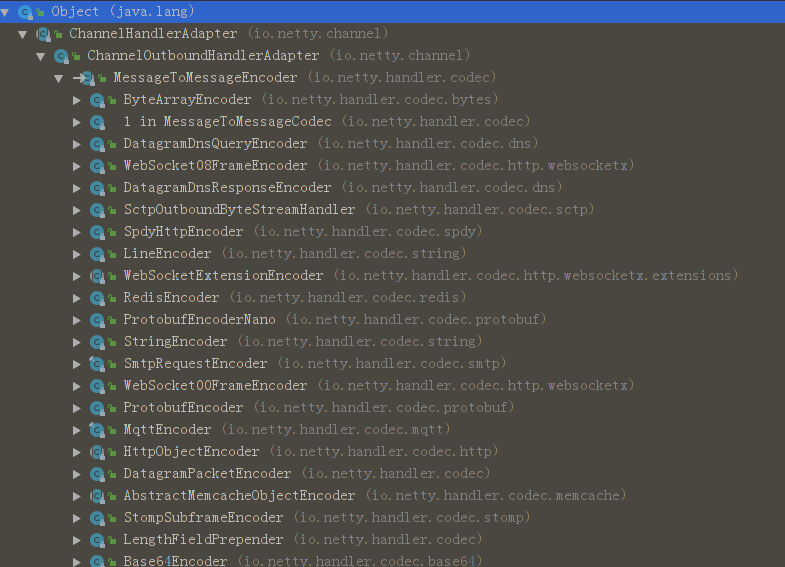
- netty还为我们提供了一些开箱即用的编码解码器
- 以上使用了jdk的序列化方式,但是还有其他更优秀的序列化框架,例如JBoss的marshalling,还有google的ProtoBuf

其他
除了以上的基本功能,netty还提供了许多丰富了类,简化开发。详细请阅读netty文档
继续学习可以阅读《netty in action》这本书
